Mini Arancini Rice Balls are a bite sized version of my favorite holiday food from when I was a kid. Not only did I make them smaller, I took my family’s traditional recipe and made it healthier and gluten-free using brown rice and lean, grass fed beef. And although these Gluten Free Arancini Rice Balls are baked, not fried, they are totally delicious and bring me right back to my childhood. This post contains affiliate links for products I’m obsessed with!
Confession #104 – As much as I try to give my kids the best Christmas possible, I could never replicate the Christmas Eve celebrations I used to have as a child.
When I was little, many of my relatives lived in the same small town in Long Island, New York…and those that didn’t lived within a few miles.
Sunday dinners, birthdays, and holidays especially were so much fun because there were so many of us around to celebrate. And Christmas Eve was the biggest party of them all.
We would all gather at my Aunt Margie’s house in the late evening, which was just across the street from our house. We would eat macaroni and clam sauce, shrimp and lots of other seafood favorites, open all of our family presents, and even had a visit from Santa.
The adults played cards around a huge table while we played with our new toys and watched Christmas movies. At midnight, when it was officially Christmas, that’s when the Rice Balls would come out, along with fresh ricotta and sausage.
For those of you who don’t know, Rice Balls, or Arancini, are an Italian snack type food that traditionally uses arborio rice and some kind of cheese to form a ball which is then dipped in egg and fried.
Our family’s traditional recipe has always been to use a high quality Pecorino Romano (Locatelli is by far the best) mixed into the rice, along with ground beef made meatball style, and some peas.
After my great grandmother and Great Aunt Nancy passed away, my mother inherited the important job of making the Rice Balls for Christmas because she used to watch them do it when she was little. There was no written recipe to follow, so thankfully she remembered all the steps.
The Rice Balls of my childhood were huge…think snowballed sized. A knife and fork were totally necessary to eat them. And while they were absolutely delicious, I have been dreaming of a bite sized version where you could taste all the flavors all at once.
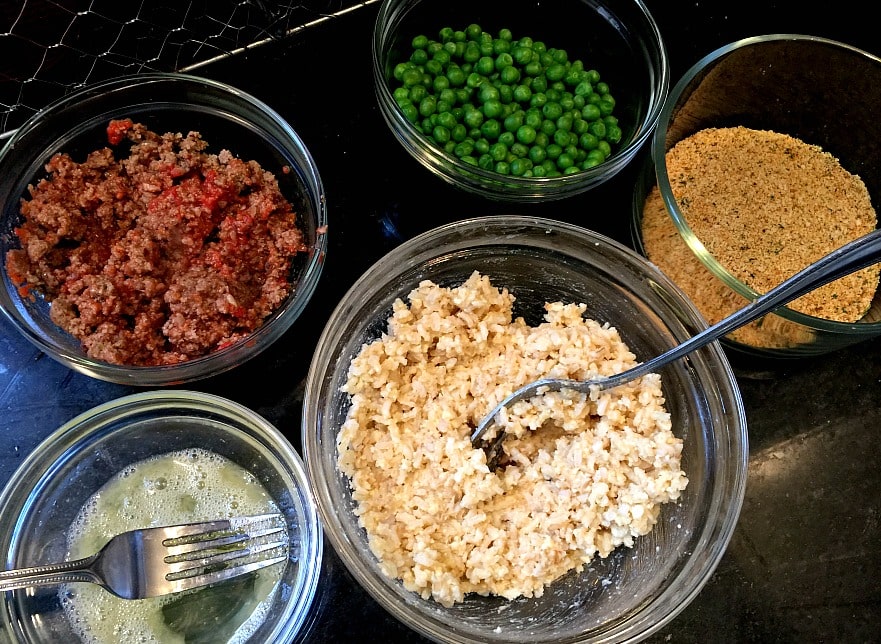
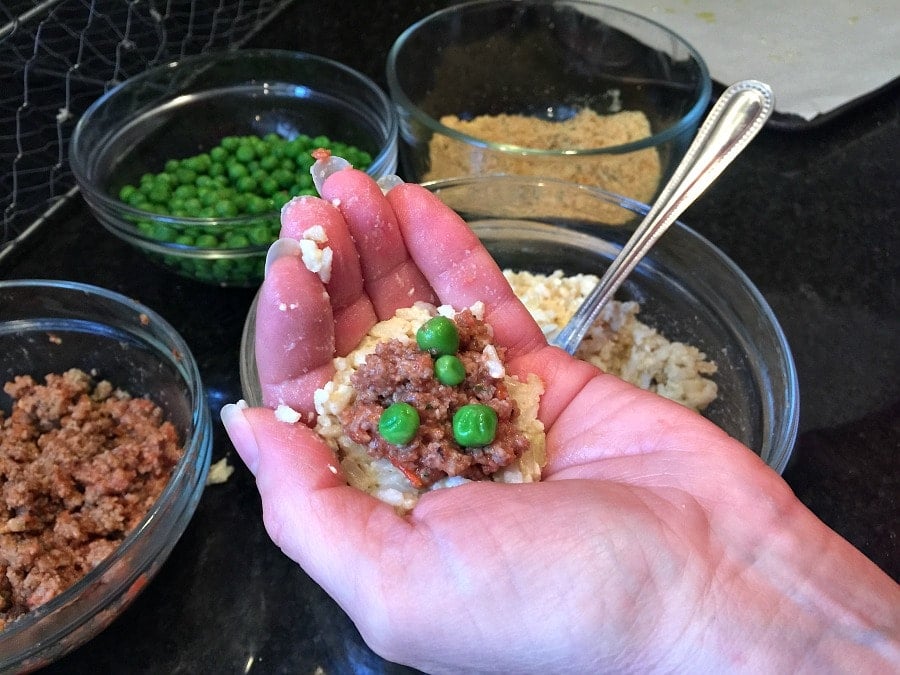
So for these Mini Arancini Rice Balls, we followed the same process, but on a much smaller scale. We started with a pinch of brown rice that we pressed flat in the palm of our hands. Then we added the meat mixture and a few peas.
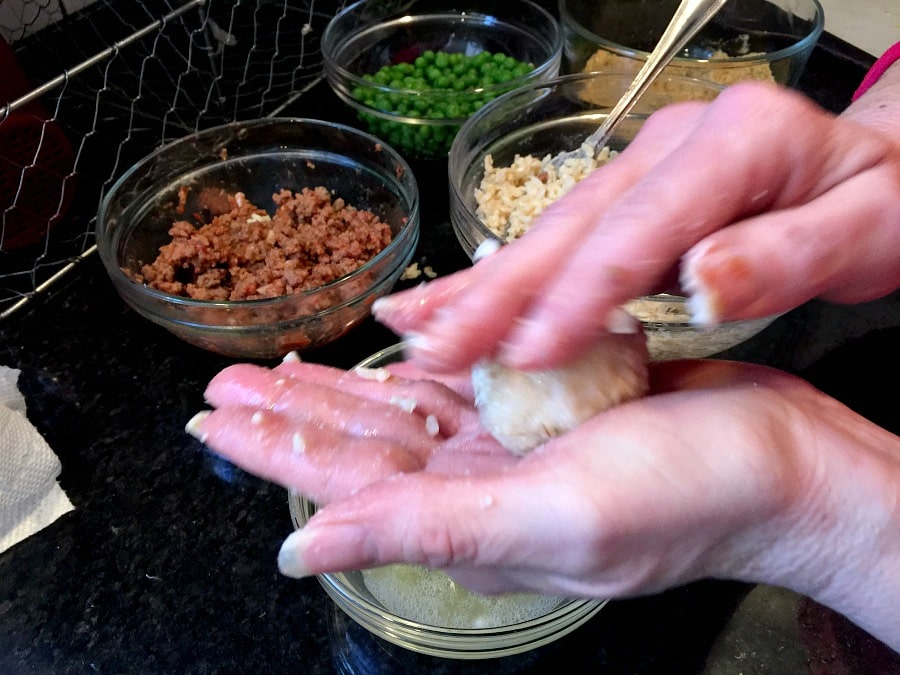
Then, in the other hand, we grabbed two bigger pinches of rice and flattened it a bit to make the top of the Rice Ball.
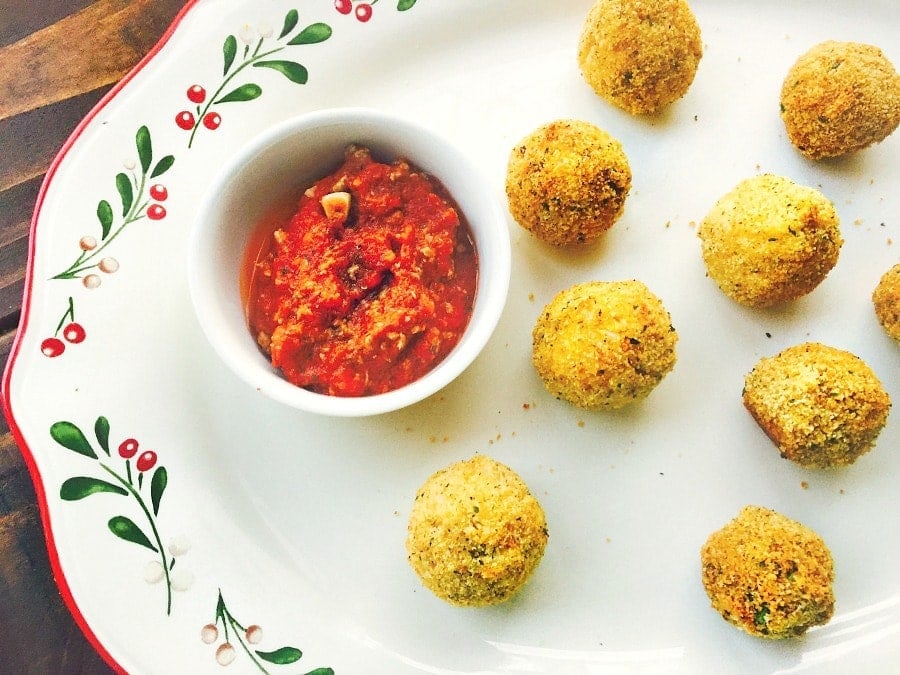
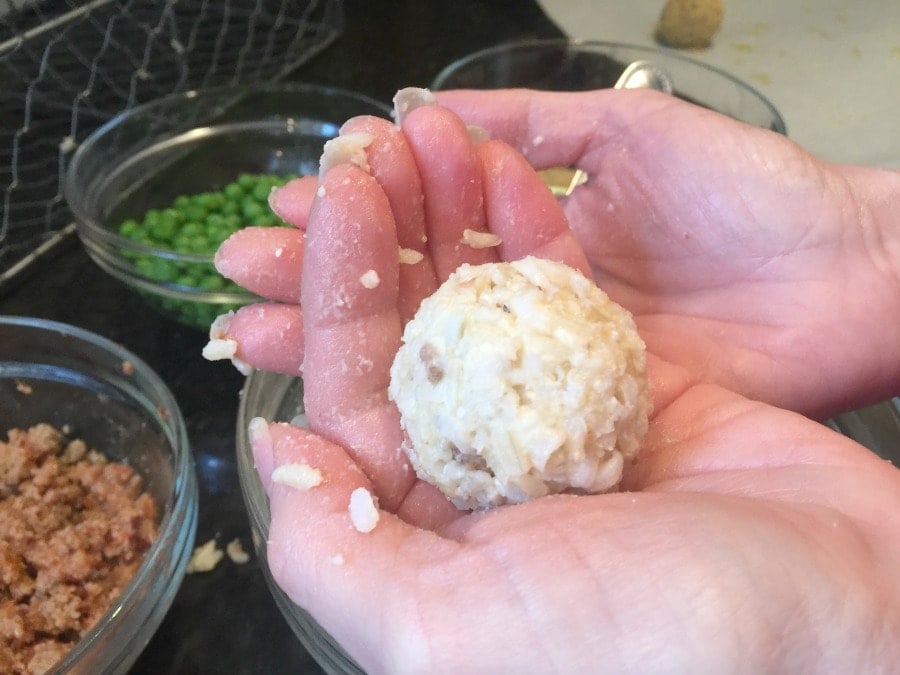
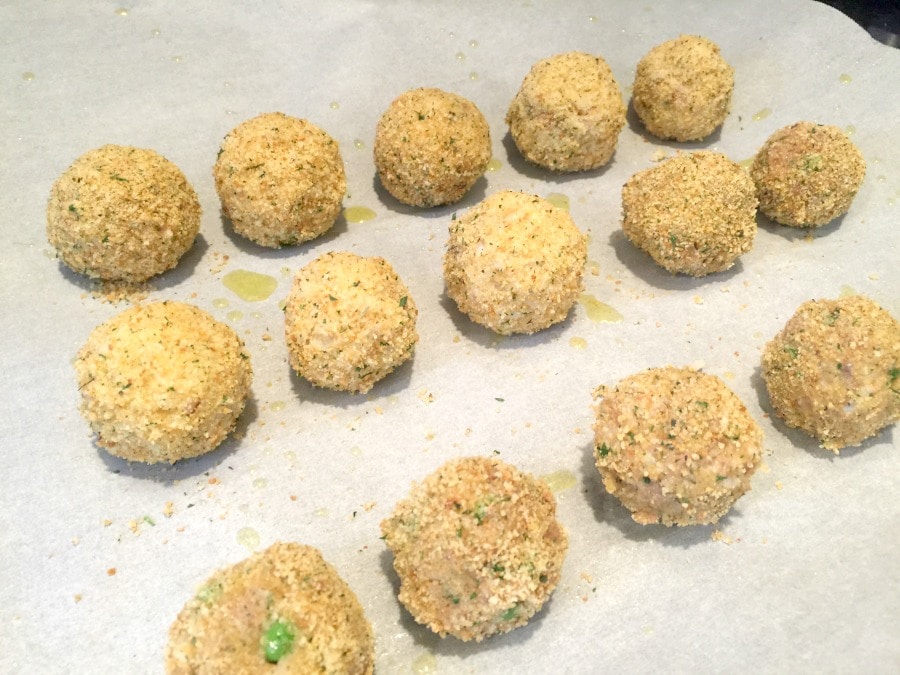
After rolling it around, it should look like this. If any meat or peas stick out, just pop them back in! My mom’s came out a little better than mine, but whatever. They all tasted amazing in the end.
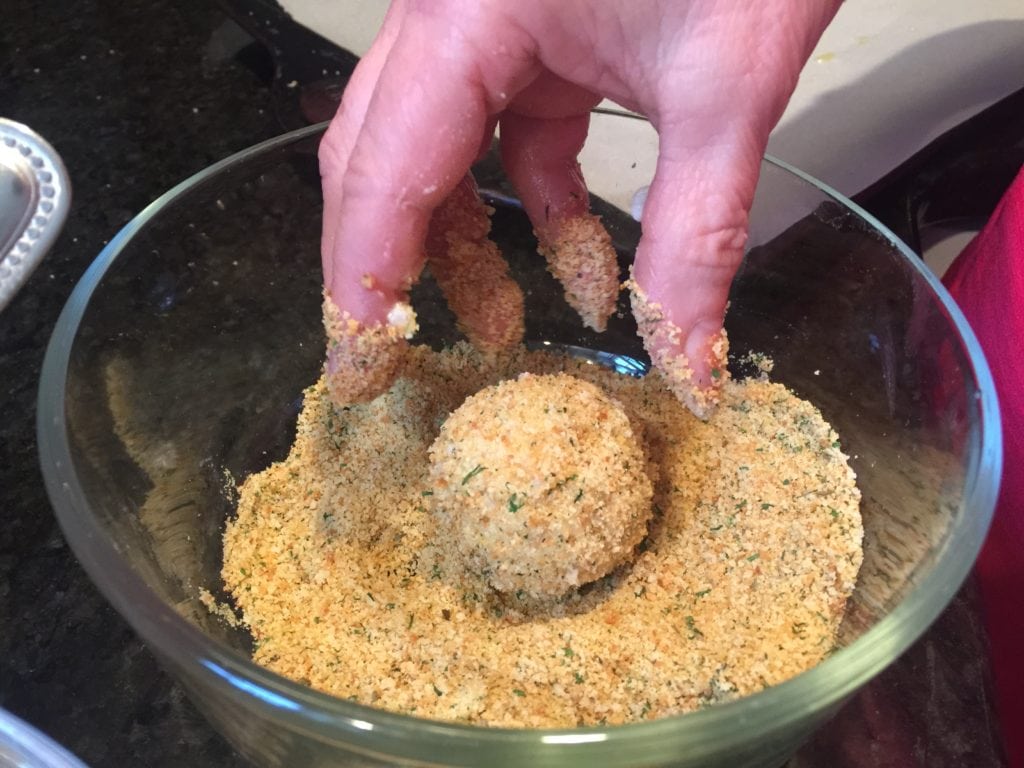
Next the ball is lightly dipped in egg white, then breaded using seasoned breadcrumbs. We made gluten free arancini rice balls, but feel free to use whatever breadcrumbs you have.
Finally, line these babies up on parchment paper and spray them with olive oil spray. I used my trusty Evo for this. Then bake at 400 for about 20 minutes or until they are golden brown.
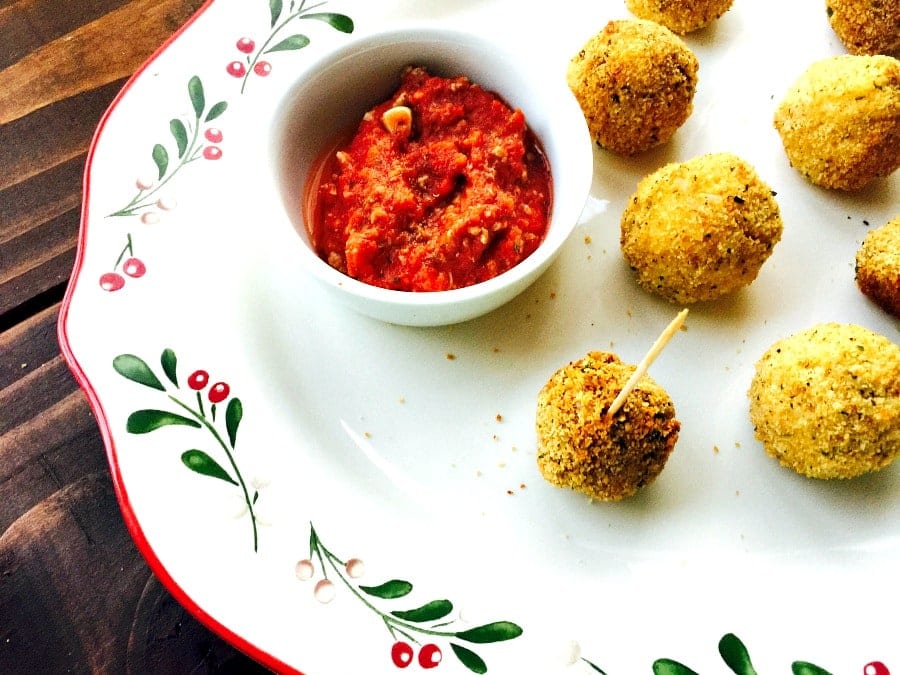
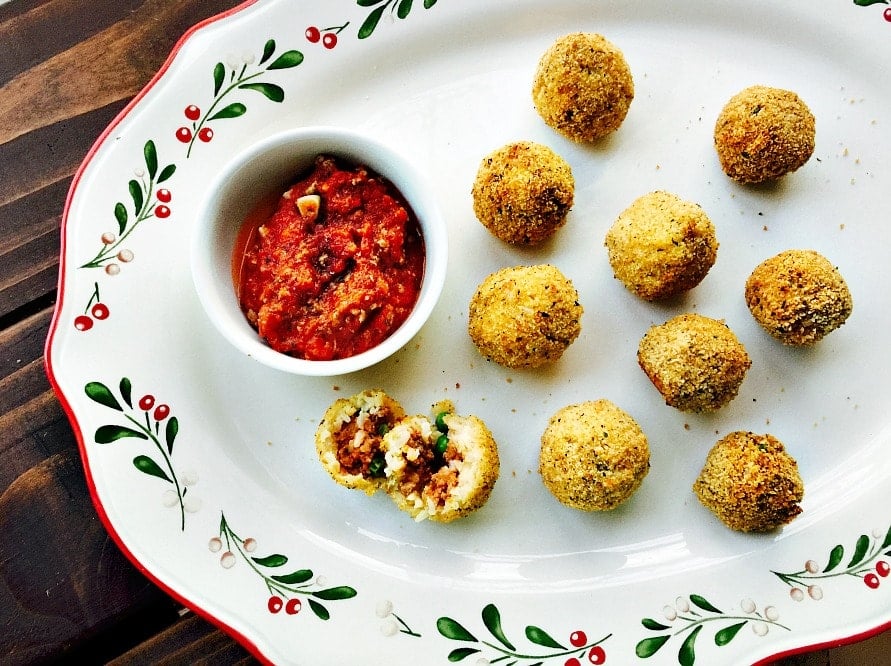
I mean – how freaking cute are these? You could easily make them in advance, like my mom used to, and then heat them up before serving.
They are yummy alone or dipped in marinara sauce and make the most adorable appetizer for your holiday party. And you don’t even have to wait until midnight to eat them!
What’s your favorite memory of food from your childhood holidays? I love hearing from my readers!
Looking for more appetizers like these Gluten Free Arancini Rice Balls? Try one of these-
Holiday Bruschetta Appetizers {21 Day Fix}
21 Day Fix Cranberry Holiday Salsa
21 Day Fix Honey Roasted Feta Dip {Gluten-free}
Instant Pot Baked Brie (21 Day Fix Approved)
Mini Arancini Rice Balls
Ingredients
- 1/2 lb grass fed ground beef
- 2 egg whites beaten
- 2 egg yolks
- 2 tablespoons onion diced up very small
- 2 cloves garlic minced
- 2 tablespoons + 1 1/2 cups of seasoned breadcrumbs we used gluten free
- 4 tablespoons pecorino romano cheese love Locatelli
- 3 1/2 cups cooked brown rice cooled (overcook your rice just a bit to get the correct mushy texture)
- 1/3 cup peas
- 4 tablespoons marinara sauce plus more for dipping
- Olive oil spray
Instructions
- Mix meat with 1 egg yolk, 2 T of cheese, onion, garlic, and 2 T of breadcrumbs. Brown over medium heat. Once meat is cooked through, remove from heat and add in sauce.
- Next, mix 1 egg yolk and 2 T cheese into cooled brown rice.
- Preheat your oven to 400 degrees and line a baking pan with parchment paper.
- Take a pinch of the rice mixture and place in your palm. Using your fingers from your other hand, press rice down to flatten and cup your hand a bit to make the bottom of the ball.
- Grab a pinch of meat and a few peas, and place them on top of the rice.
- Next, take double the amount of rice as you did in step 4 and cup it over the top of the ball, closing it around the meat and pea mixture. If any ingredients stick out of the rice, just push it back in.
- Lightly dip the ball in the egg whites, then carefully dredge it in the breadcrumbs, shaking off any excess.
- Place the breaded ball on your parchment paper and then - very important - wash your hands before starting on the next rice ball.
- After all the balls have been made, spray them with olive oil spray. Bake for 18-20 minutes on 400 or until they turn a light golden brown.
- Enjoy warm with some marinara sauce for dipping!




Janette Massino says
This was posted so long ago, but since I mostly go strictly by your meal plans, I haven’t stumbled across it until now. I was wondering how I could do this in the air fryer. (I always burn air fryer stuff when I go off script- lol).
Thanks so much! I tell everyone about your recipes! I’m so glad that I found your site.
Nancylynn says
First, thank you so much for sharing recipes- that is the biggest compliment! Second, I would try the rice balls on 375 for 10 min, check them and see if they need more time. Let us know how it goes!
beth says
I LOVE YOUR BLOG!!!!!! Thank you thank you for bringing this to life to me today with your family traditions and BONUS its healthy! I grew up in New England so we ate alot of seafood dishes also! This looks great thanks for sharing!
Nancylynn says
Thank YOU for the sweetest note! I am SO jealous of your seafood in NE. We had great seafood when I lived on LI…but here in PA, not so much. I miss it! Have a wonderful holiday and thank you again!